WordPress to EmDash Migration Guide
Move a WordPress site into EmDash with a staged import workflow, media verification, and a clear plan for custom content.
Moving from WordPress to EmDash is easiest when you treat the migration as a content and schema project first, not a theme recreation exercise. Get the content across, verify media and structure, then handle custom rendering and design parity after the data model is stable.
Before you start
Before running any import, make sure you know what kind of WordPress site you are moving.
Review these areas first:
- standard posts and pages
- media attachments
- custom post types
- custom fields and editorial metadata
- Gutenberg blocks or shortcode-heavy content
This matters because a simple publishing site usually imports cleanly, while a WordPress site that depends heavily on custom blocks, plugin-generated fields, or special frontend rendering will need a second implementation pass after import.
Import options
There are two sensible ways to bring WordPress content into EmDash.
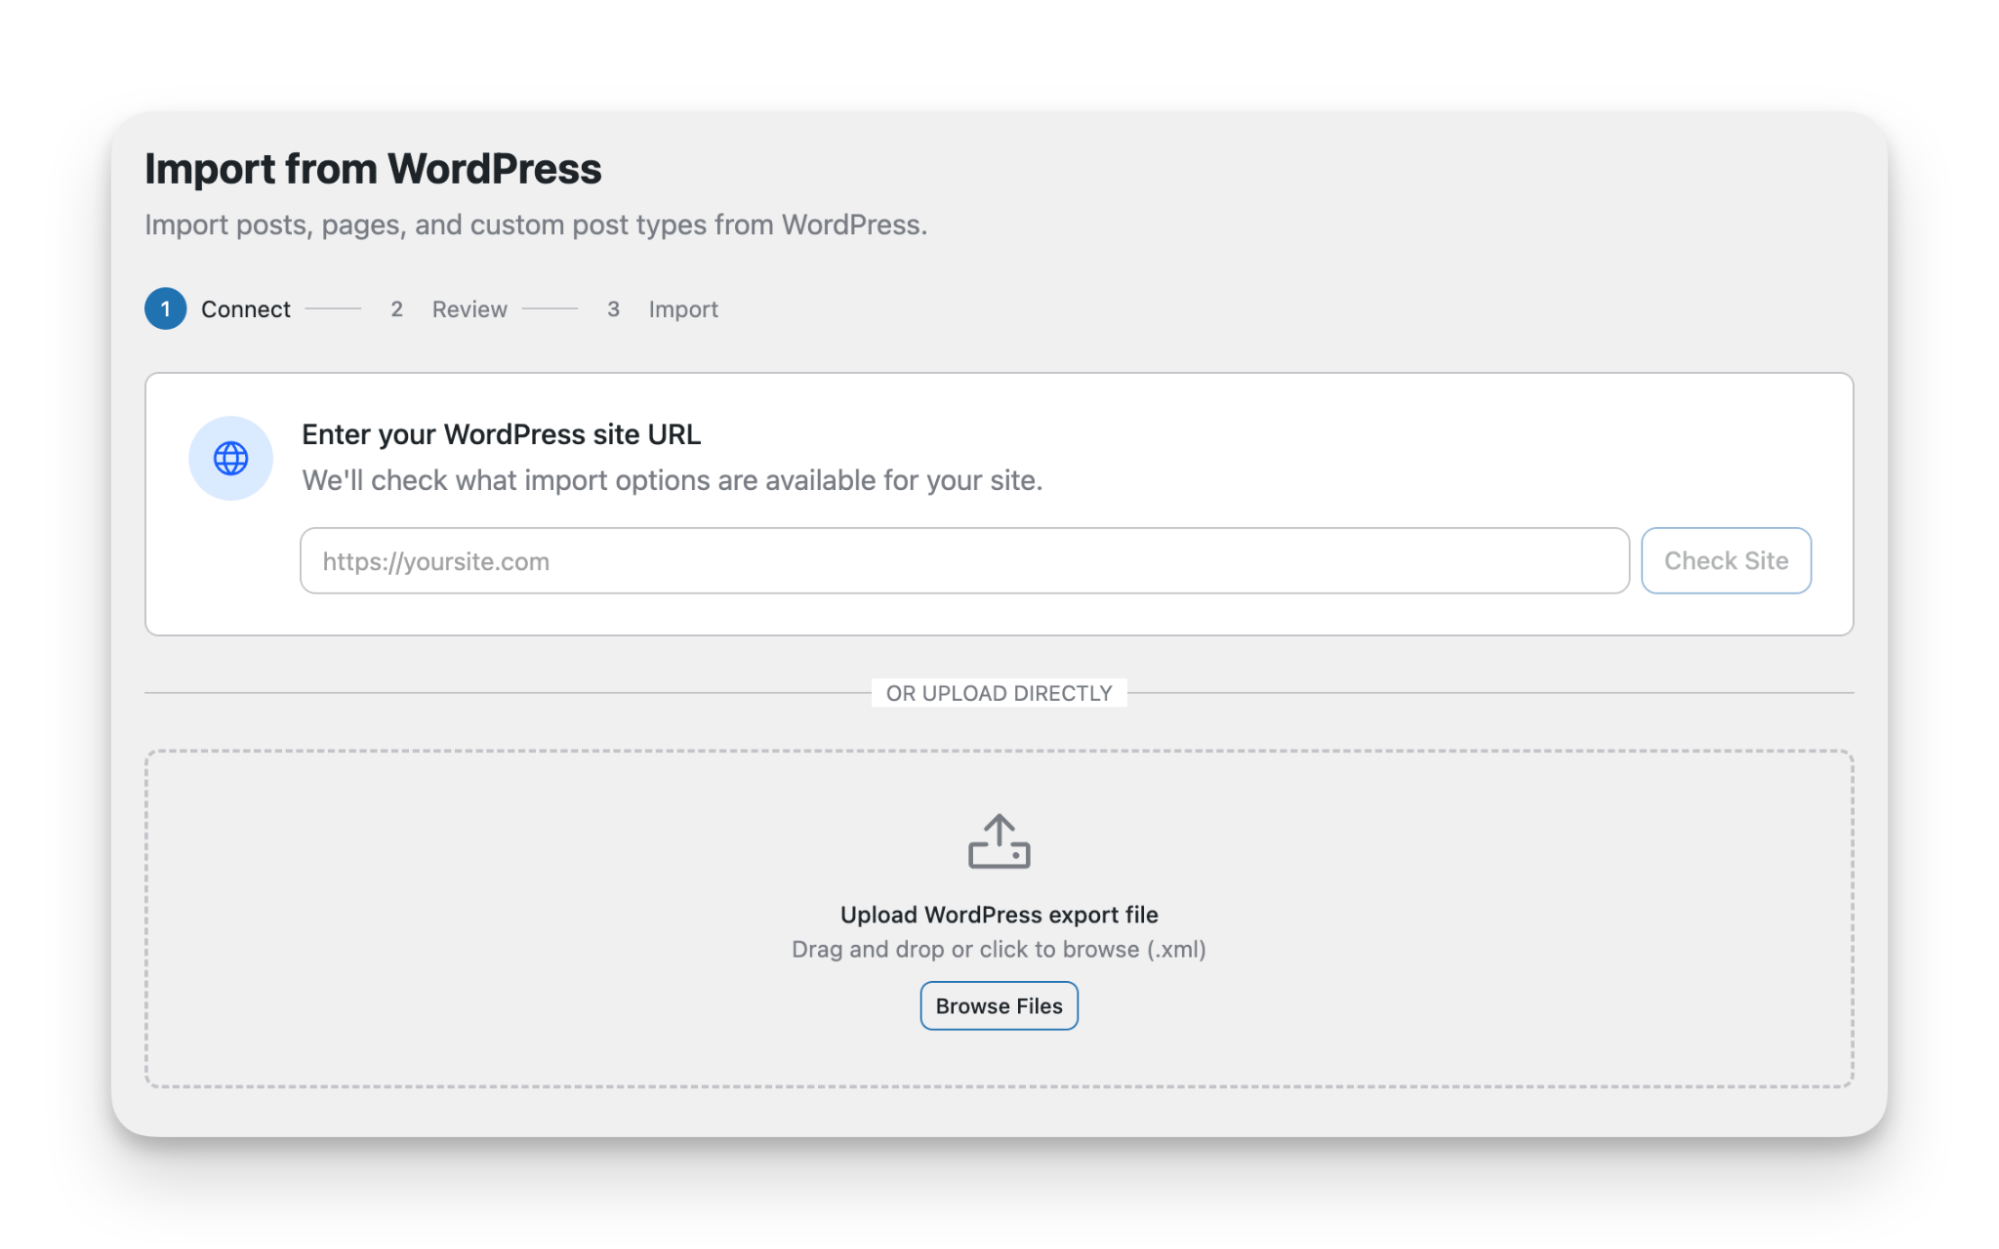
WXR export
Use a WXR export when you want a file-based migration workflow.
This is usually the better option when:
- you want a portable export artifact
- multiple people need to review or archive the source export
- you want a clearer boundary between source data and destination validation
Typical flow:
- Open WordPress admin.
- Export the site content as a
WXRfile. - Start the import in EmDash using that export.
- Review the imported entries and media.
EmDash Exporter plugin
Use the EmDash Exporter plugin when you want a direct transfer path from a live WordPress instance.
Typical flow:
- Install the plugin on the WordPress site.
- Configure the secure export endpoint it provides.
- Protect access with a WordPress Application Password.
- Run the import into EmDash from that protected source.
This is the better option when the source site is still actively managed and you want a more direct pull instead of passing around export files.
Recommended path
For most teams, the safest sequence is:
- Prepare the EmDash site that will receive the content.
- Choose one import method and run a first-pass migration.
- Verify that entries and media arrived correctly.
- Create proper EmDash content types for anything that should not remain generic editorial content.
- Rebuild custom rendering only after the imported content structure is trustworthy.
That order keeps the highest-risk work until after the data is visible and reviewable in EmDash.
Validation after import
Do not judge the migration by whether the import completes. Judge it by whether the imported content is usable.
Your first validation pass should check:
- posts and pages exist in the expected volume
- attached media has been brought into the EmDash media library
- titles, body content, and publishing metadata look reasonable
- editorial relationships still make sense after import
At this stage, resist the urge to fix visual details first. If the content model is still wrong, design work becomes expensive rework.
Custom content
WordPress sites often outgrow the default Post and Page model. If your site uses custom post types, treat them as a schema decision during migration, not as a formatting issue.
In EmDash, the better approach is to create native content types for content that deserves its own structure. That usually means reviewing:
- which content should remain standard editorial entries
- which content should become separate EmDash collections
- which fields should be modeled explicitly instead of left implicit in body content
This is where migration quality usually rises or falls. A WordPress import can succeed technically while still producing a weak EmDash implementation if every content shape is flattened into generic entries.
Blocks and bespoke rendering
Custom blocks should be handled deliberately. If the old site depends on bespoke Gutenberg blocks, shortcode-driven layouts, or plugin-specific rendering, expect follow-up work.
A sensible approach is:
- import the underlying content first
- identify rendering patterns that need to survive the move
- rebuild those pieces using EmDash-native tools and components
If you need to recreate bespoke block behavior, the EmDash Block Kit Agent Skill is the relevant starting point.
Practical checklist
Use this as a working migration checklist:
- audit posts, pages, media, and custom post types in WordPress
- decide whether
WXRor the EmDash Exporter plugin is the better import path - prepare the destination EmDash site
- run the first import
- verify media transfer and entry integrity
- create native EmDash content types where needed
- identify custom rendering that needs a second implementation pass
- review content structure before attempting visual parity
What still needs planning
Even with a clean import path, some migration work still sits outside the importer itself:
- redirects
- SEO parity checks
- field cleanup
- custom rendering parity
- rollback and launch sequencing
The import gets content into EmDash. It does not remove the need for editorial review, schema decisions, and launch discipline.