本指南涵蓋使用 EmDash 建立部落格的完整流程,從定義內容類型到使用分類和標籤展示文章。
前置條件
- 已設定並運行的 EmDash 網站(請參閱快速入門)
- 對 Astro 元件的基本了解
定義 Posts Collection
EmDash 在設定過程中會建立一個預設的 “posts” collection。您可以透過管理面板或 API 進行自訂。
預設的 posts collection 包含:
title- 文章標題slug- URL 友善的識別碼content- 富文本內文excerpt- 簡短描述featured_image- 頭圖(選填)status- 草稿、已發佈或已排程publishedAt- 發佈日期(系統欄位)
建立您的第一篇文章
-
在
/_emdash/admin開啟管理面板 -
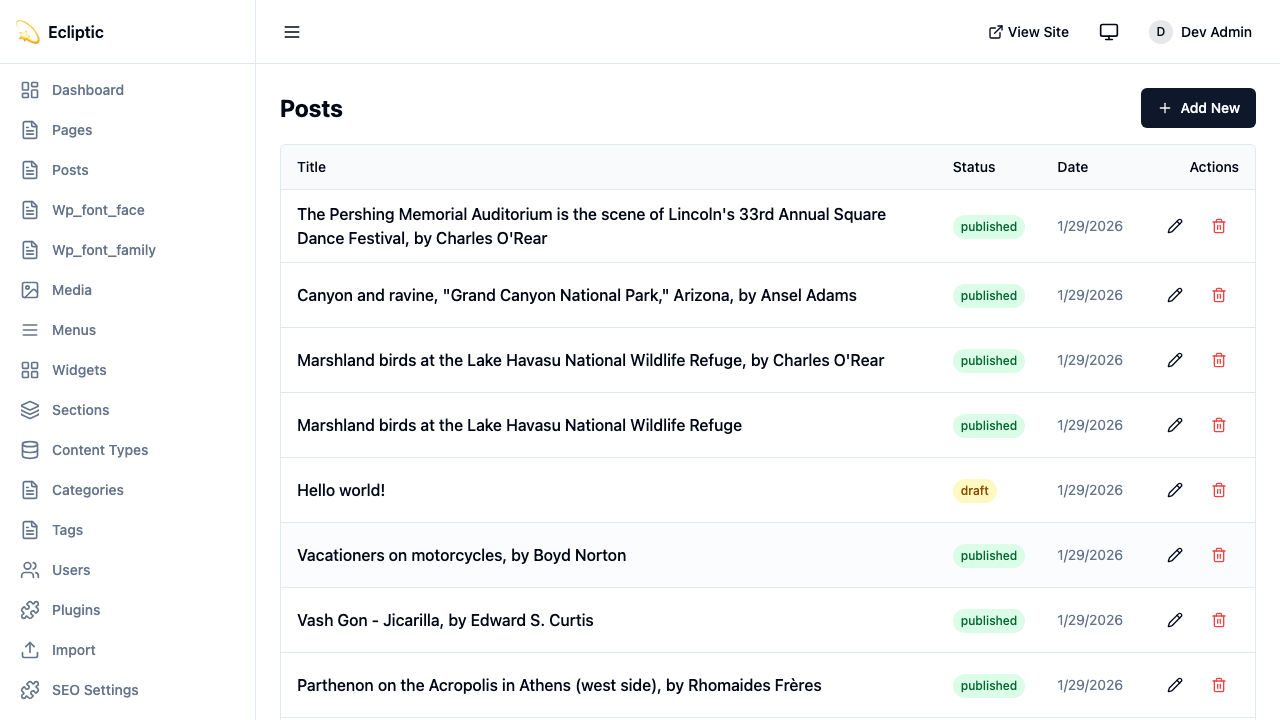
點擊側邊欄中的 Posts
-
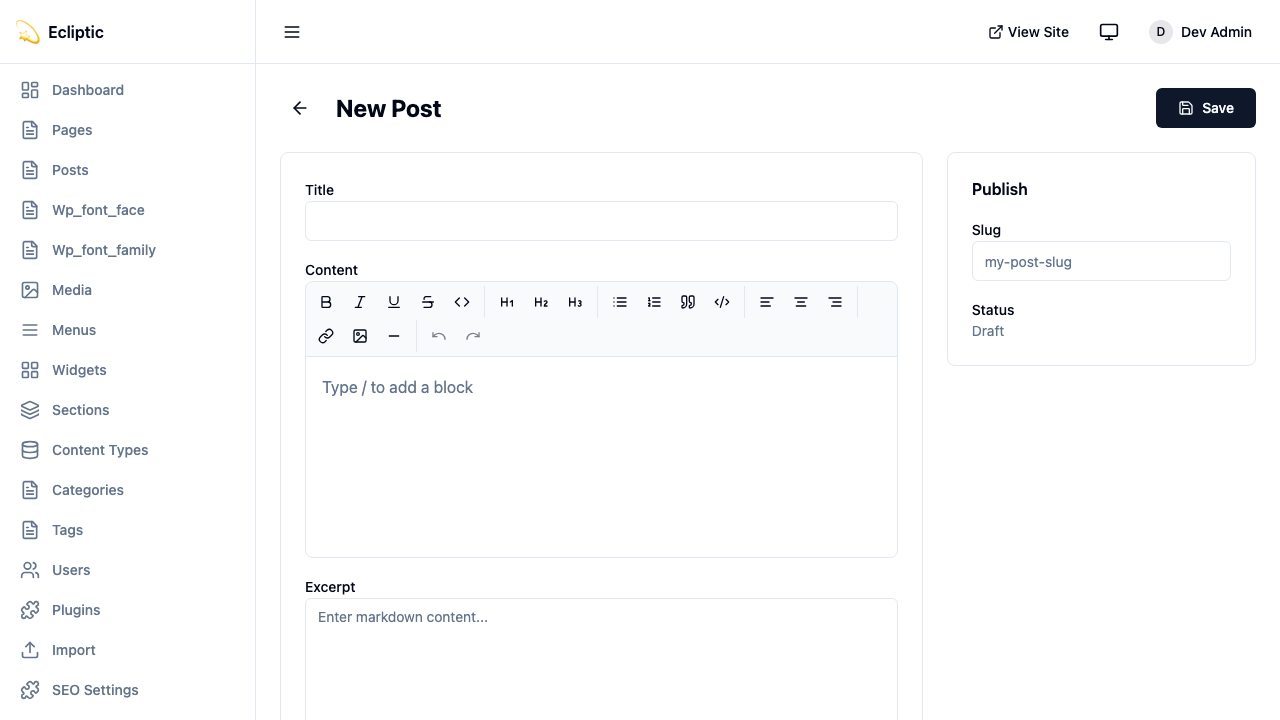
點擊 New Post
-
輸入標題並使用富文本編輯器撰寫內容
-
在側邊欄面板中新增分類和標籤
-
將狀態設為已發佈
-
點擊儲存
文章現已上線並立即顯示。
在網站上展示文章
列出所有文章
以下頁面展示所有已發佈的文章:
---
import { getEmDashCollection } from "emdash";
import Base from "../../layouts/Base.astro";

const { entries: posts } = await getEmDashCollection("posts", {
  status: "published",
});

// 按發佈日期排序,最新的在前
const sortedPosts = posts.sort(
  (a, b) => (b.data.publishedAt?.getTime() ?? 0) - (a.data.publishedAt?.getTime() ?? 0)
);
---

<Base title="部落格">
  <h1>部落格</h1>
  <ul>
    {sortedPosts.map((post) => (
      <li>
        <a href={`/blog/${post.data.slug}`}>
          <h2>{post.data.title}</h2>
          <p>{post.data.excerpt}</p>
          <time datetime={post.data.publishedAt?.toISOString()}>
            {post.data.publishedAt?.toLocaleDateString()}
          </time>
        </a>
      </li>
    ))}
  </ul>
</Base>
展示單篇文章
以下動態路由渲染單篇文章:
---
import { getEmDashCollection, getEmDashEntry } from "emdash";
import { PortableText, Image } from "emdash/ui";
import Base from "../../layouts/Base.astro";

export async function getStaticPaths() {
  const { entries: posts } = await getEmDashCollection("posts", {
    status: "published",
  });

  return posts.map((post) => ({
    params: { slug: post.data.slug },
  }));
}

const { slug } = Astro.params;
const { entry: post } = await getEmDashEntry("posts", slug);

if (!post) {
  return Astro.redirect("/404");
}
---

<Base title={post.data.title}>
  <article>
    {post.data.featured_image && (
      <Image image={post.data.featured_image} alt="" />
    )}
    <h1>{post.data.title}</h1>
    <time datetime={post.data.publishedAt?.toISOString()}>
      {post.data.publishedAt?.toLocaleDateString()}
    </time>
    <PortableText value={post.data.content} />
  </article>
</Base>新增分類和標籤
EmDash 包含內建的分類和標籤分類法。有關建立和管理術語的詳情,請參閱分類法。
按分類篩選文章
以下路由列出單一分類下的文章:
---
import { getEmDashCollection, getTerm, getTaxonomyTerms } from "emdash";
import Base from "../../layouts/Base.astro";

export async function getStaticPaths() {
  const categories = await getTaxonomyTerms("category");

  // 展平層級分類
  const flatten = (terms) => terms.flatMap((t) => [t, ...flatten(t.children)]);

  return flatten(categories).map((cat) => ({
    params: { slug: cat.slug },
    props: { category: cat },
  }));
}

const { category } = Astro.props;

const { entries: posts } = await getEmDashCollection("posts", {
  status: "published",
  where: { category: category.slug },
});
---

<Base title={category.label}>
  <h1>{category.label}</h1>
  {category.description && <p>{category.description}</p>}

  <ul>
    {posts.map((post) => (
      <li>
        <a href={`/blog/${post.data.slug}`}>{post.data.title}</a>
      </li>
    ))}
  </ul>
</Base>
展示文章分類
以下元件顯示指派給文章的分類和標籤:
---
import { getEntryTerms } from "emdash";

interface Props {
  postId: string;
}

const { postId } = Astro.props;
const categories = await getEntryTerms("posts", postId, "category");
const tags = await getEntryTerms("posts", postId, "tag");
---

<div class="post-meta">
  {categories.length > 0 && (
    <div class="categories">
      <span>分類:</span>
      {categories.map((cat) => (
        <a href={`/category/${cat.slug}`}>{cat.label}</a>
      ))}
    </div>
  )}

  {tags.length > 0 && (
    <div class="tags">
      <span>標籤:</span>
      {tags.map((tag) => (
        <a href={`/tag/${tag.slug}`}>{tag.label}</a>
      ))}
    </div>
  )}
</div>
新增分頁
對於文章較多的部落格,以下路由對文章列表進行分頁:
---
import { getEmDashCollection } from "emdash";
import Base from "../../../layouts/Base.astro";

const POSTS_PER_PAGE = 10;

export async function getStaticPaths() {
  const { entries: allPosts } = await getEmDashCollection("posts", {
    status: "published",
  });

  const totalPages = Math.ceil(allPosts.length / POSTS_PER_PAGE);

  return Array.from({ length: totalPages }, (_, i) => ({
    params: { page: String(i + 1) },
    props: { currentPage: i + 1, totalPages },
  }));
}

const { currentPage, totalPages } = Astro.props;

const { entries: allPosts } = await getEmDashCollection("posts", {
  status: "published",
});

const sortedPosts = allPosts.sort(
  (a, b) => (b.data.publishedAt?.getTime() ?? 0) - (a.data.publishedAt?.getTime() ?? 0)
);

const start = (currentPage - 1) * POSTS_PER_PAGE;
const posts = sortedPosts.slice(start, start + POSTS_PER_PAGE);
---

<Base title={`部落格 - 第 ${currentPage} 頁`}>
  <h1>部落格</h1>

  <ul>
    {posts.map((post) => (
      <li>
        <a href={`/blog/${post.data.slug}`}>{post.data.title}</a>
      </li>
    ))}
  </ul>

  <nav>
    {currentPage > 1 && (
      <a href={`/blog/page/${currentPage - 1}`}>上一頁</a>
    )}
    <span>第 {currentPage} 頁,共 {totalPages} 頁</span>
    {currentPage < totalPages && (
      <a href={`/blog/page/${currentPage + 1}`}>下一頁</a>
    )}
  </nav>
</Base>
新增 RSS 訂閱
以下端點為部落格產生 RSS 訂閱:
import rss from "@astrojs/rss";
import { getEmDashCollection } from "emdash";

export async function GET(context) {
	const { entries: posts } = await getEmDashCollection("posts", {
		status: "published",
	});

	return rss({
		title: "我的部落格",
		description: "使用 EmDash 建立的部落格",
		site: context.site,
		items: posts.map((post) => ({
			title: post.data.title,
			pubDate: post.data.publishedAt,
			description: post.data.excerpt,
			link: `/blog/${post.data.slug}`,
		})),
	});
}
該訂閱依賴 @astrojs/rss 套件。使用以下命令安裝:
npm install @astrojs/rss